Introduction to MS Teams
/cdn.vox-cdn.com/uploads/chorus_asset/file/19344713/microsoftteams.jpg)
Microsoft Teams is a persistent chat-based collaboration platform complete with document sharing, online meetings, and many more extremely useful features that many CSN faculty and staff already use everyday. As Teams is an ever-evolving platform, this page is designed to keep you abreast of current and upcoming features that you may find useful for teaching, collaborating and more.
Breakout Rooms
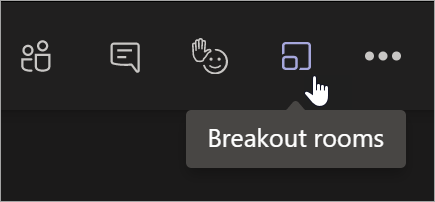
Divide students into smaller groups during class meetings. Once the meeting has started, meeting organizers can create up to 50
sub-groups, open and close rooms more than once, and move participants between rooms.
Watch Microsoft's demo video to learn more about creating and using Breakout Rooms.
New Meeting Experience

Microsoft has begun rolling out a variety of new and useful features to Microsoft Teams.The features below are part of Microsoft’s “new meeting experience”.
These features will be available by default in the coming weeks, but you can enable them now to get an early look.This article details how to activate the new experience and how to use the features that it includes.
Meeting notes are now taken directly on the meeting’s Meeting notes tab in the main Teams window. (This is one of the benefits of having the meeting in a separate window.) To access or take notes from within the meeting window, select More options (…) > Show meeting notes and you’ll see the usual side pane come up. In the pane, there is a Take notes button that brings you to the Meeting notes tab.
Focus mode is available when content is being shared. If you’d like to pay close attention to content, without the distraction of seeing video feeds, Focus mode is for you. It’s available in the meeting controls under More options (…) > Focus mode.
Together mode places each meeting participant in a seat in a virtual audience. This is meant to create a sense of being in one room with all participants.
Together mode is only available when 5 or more participants are sharing video
Together mode can be activated using the menu opened by clicking on the “…” icon in the top-right corner of the screen.

Together mode will place each participant’s video stream in a virtual seat. This will look something like this:
When to use Together Mode
Together mode is best suited to meetings that will have multiple speakers, groups that will have trouble maintaining attention, and presenters that would like to “read the room” and see all of their attendees faces at once.
When not to use Together Mode
Together mode does not show a user’s background, including items like a whiteboard. If this is required, together mode is not recommended.
Meetings that will see a lot of people moving around and out of their seats will want to avoid together mode, as this will look strange on the screen.
Together mode currently only supports up to 49 users at a time. Meetings with more participants than this may want to consider other options.
Large gallery view lets you see up to 49 video streams at once. This view is available when there are 10 or more attendees who are sharing video. To switch to large gallery, go to More options (…) in the meeting controls > Large gallery.

Here’s an example of what the Large gallery looks like:

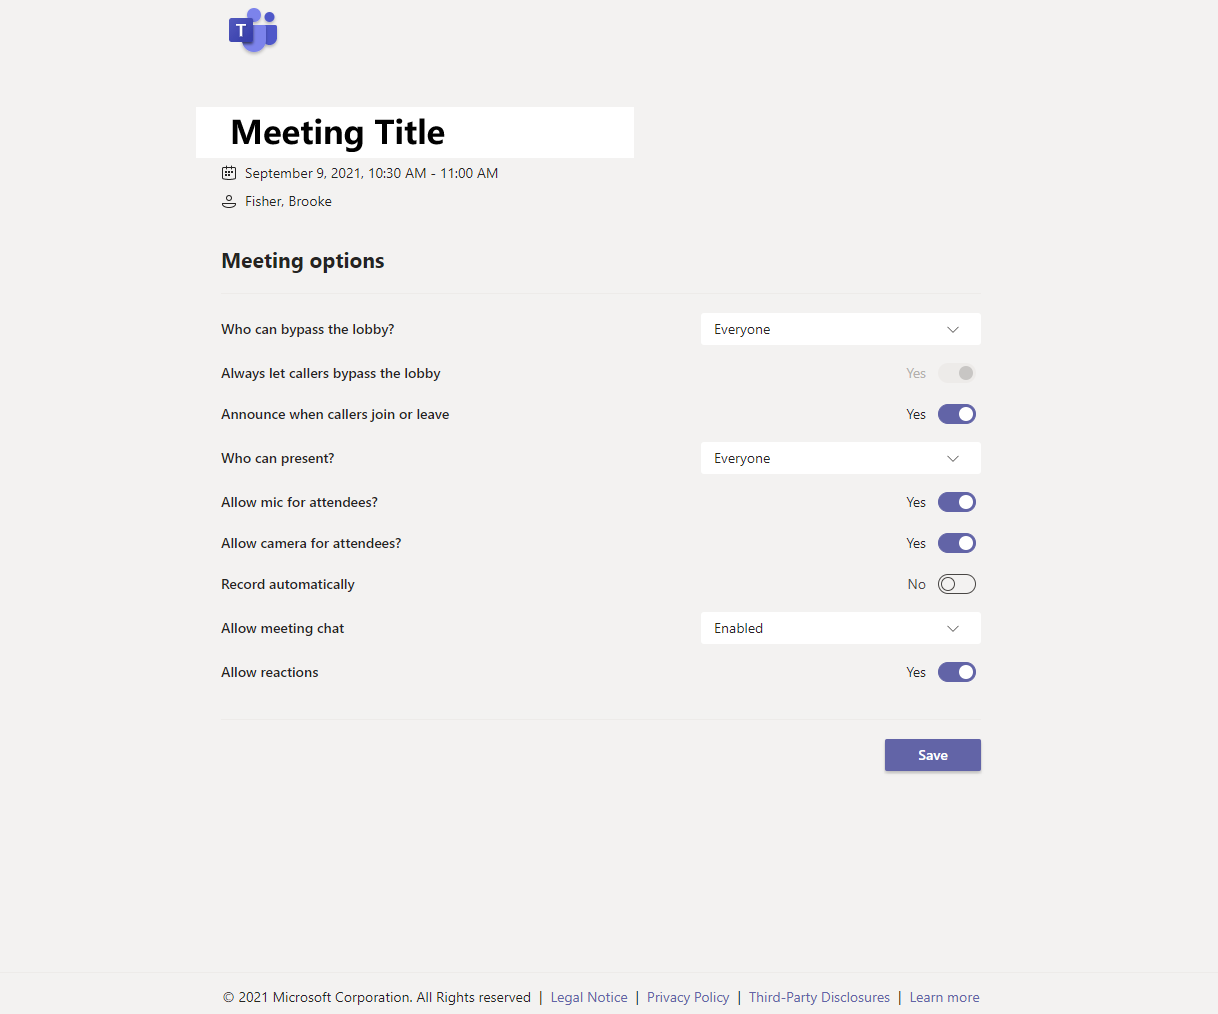
Meeting Options allow you to control various participant settings.
How to access Meeting options:
- In Teams, go to Calendar, open a meeting, and then select Meeting options in the toolbar across the top.
- You will be redirected to a web page were you can can then set options like Lobby, Chat and Presenting permissions.
- During a meeting, select More actions
 at the top of the meeting window, and then Meeting options. A panel will open on the right, and you can change your options right from there.
- Another way to get there during a meeting is to select Show participants
 in the meeting controls. Then, above the list of participants, choose the three dots, select Manage permission to go to the Meeting options screen.
- Another way to get there during a meeting is to select Show participants
Teams Meetings in CANVAS
Microsoft Teams is now part of your left navigation in your Canvas shells. You can create your meetings right in Canvas and invite all your students. Your students will receive an email to their CSN account.
Before you can use the Microsoft Teams meetings tool, you will need to enable the feature.
- Go to the course you would like to add Teams Meetings.
- Select Settings from the course navigation menu.
- Select the Integrations tab.
- Enable Microsoft Sync by turning the toggle on.
Follow the steps below if you would like to change were Microsoft Teams meetings appears on you navigation menu.
- Select Settings from the course navigation menu.
- Select the Navigation tab.
- Drag and drop the Teams Meetings item from the bottom of the list to the desired location.
- Select Save when done.
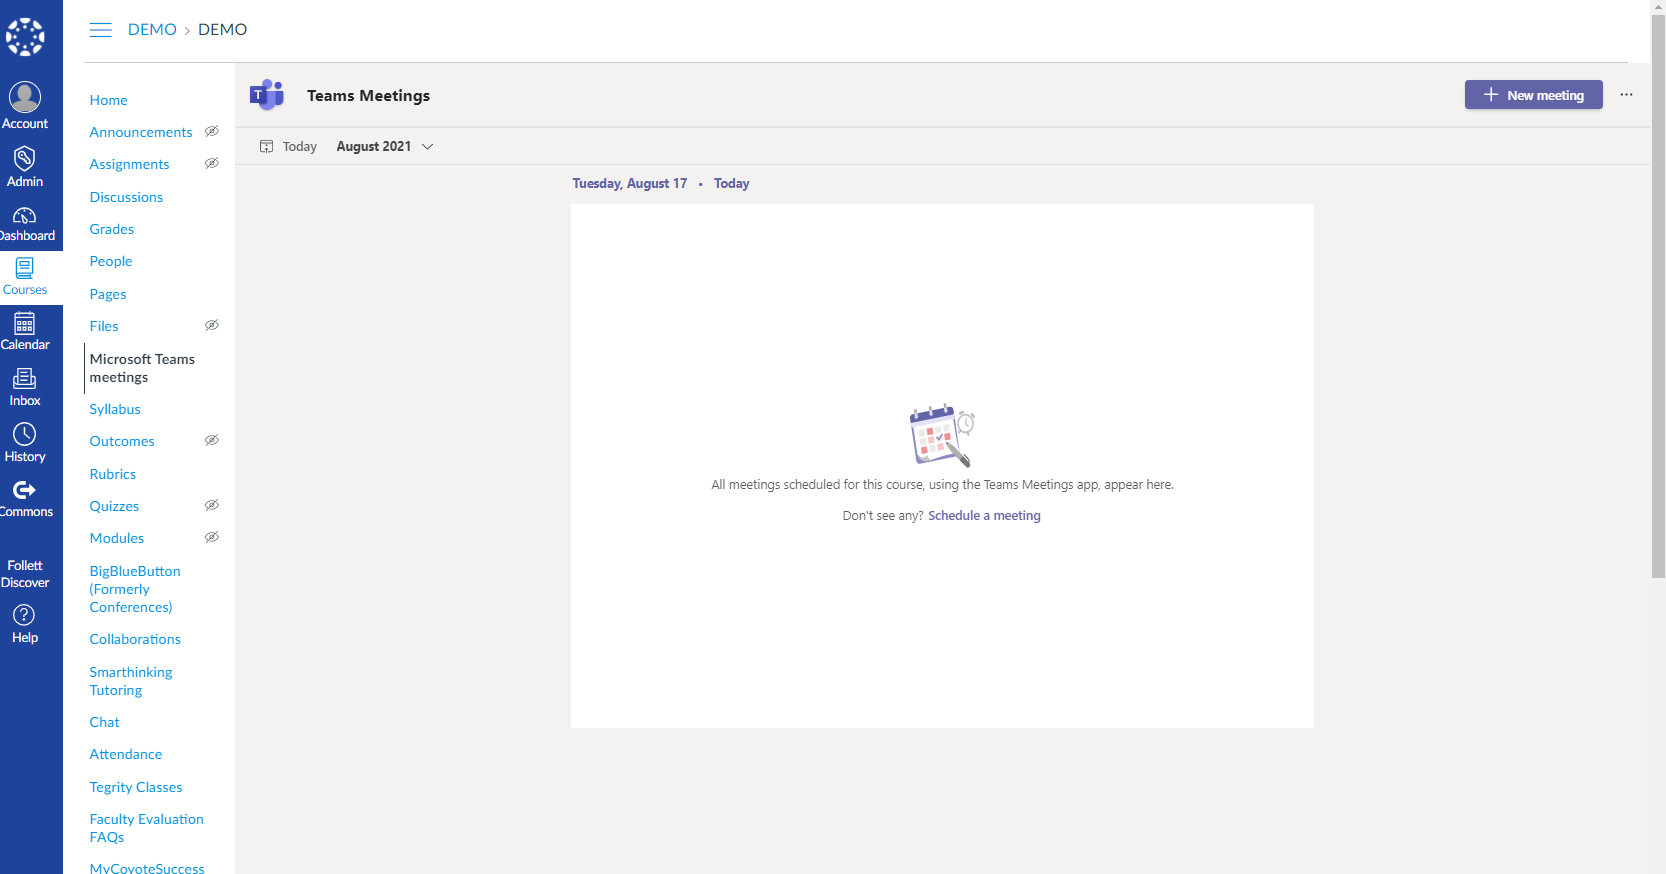
Creating a meeting:
- Select the Microsoft Teams meetings button.
- Note: It might be at the very bottom of your navigation menu.
- Select New Meeting in the top right corner and follow on screen instructions for creating your meeting.
Visit setting up Meetings for more information on using Microsoft Teams meetings in CANVAS.
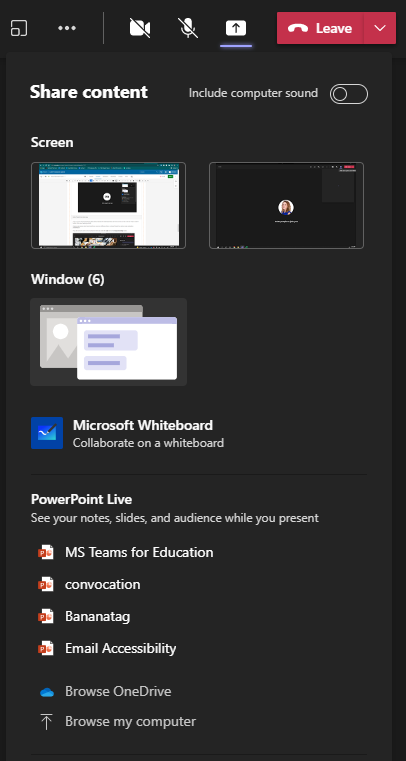
- At the top of your screen, click the Share content button from your meeting controls.
- Choose to share your entire screen, individual windows, or a PowerPoint file.
- Note: If you are sharing a video and want to make sure other members of the meeting can hear, select the Include computer sound button.
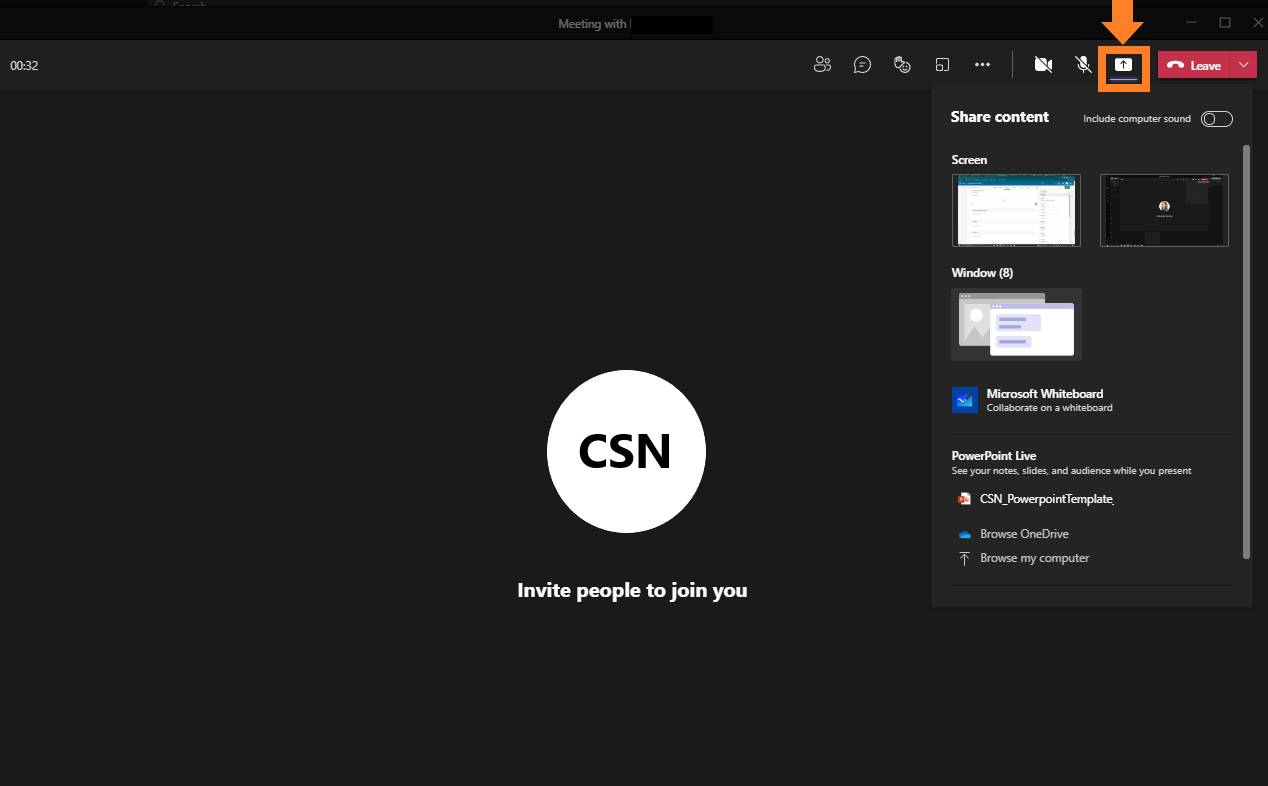
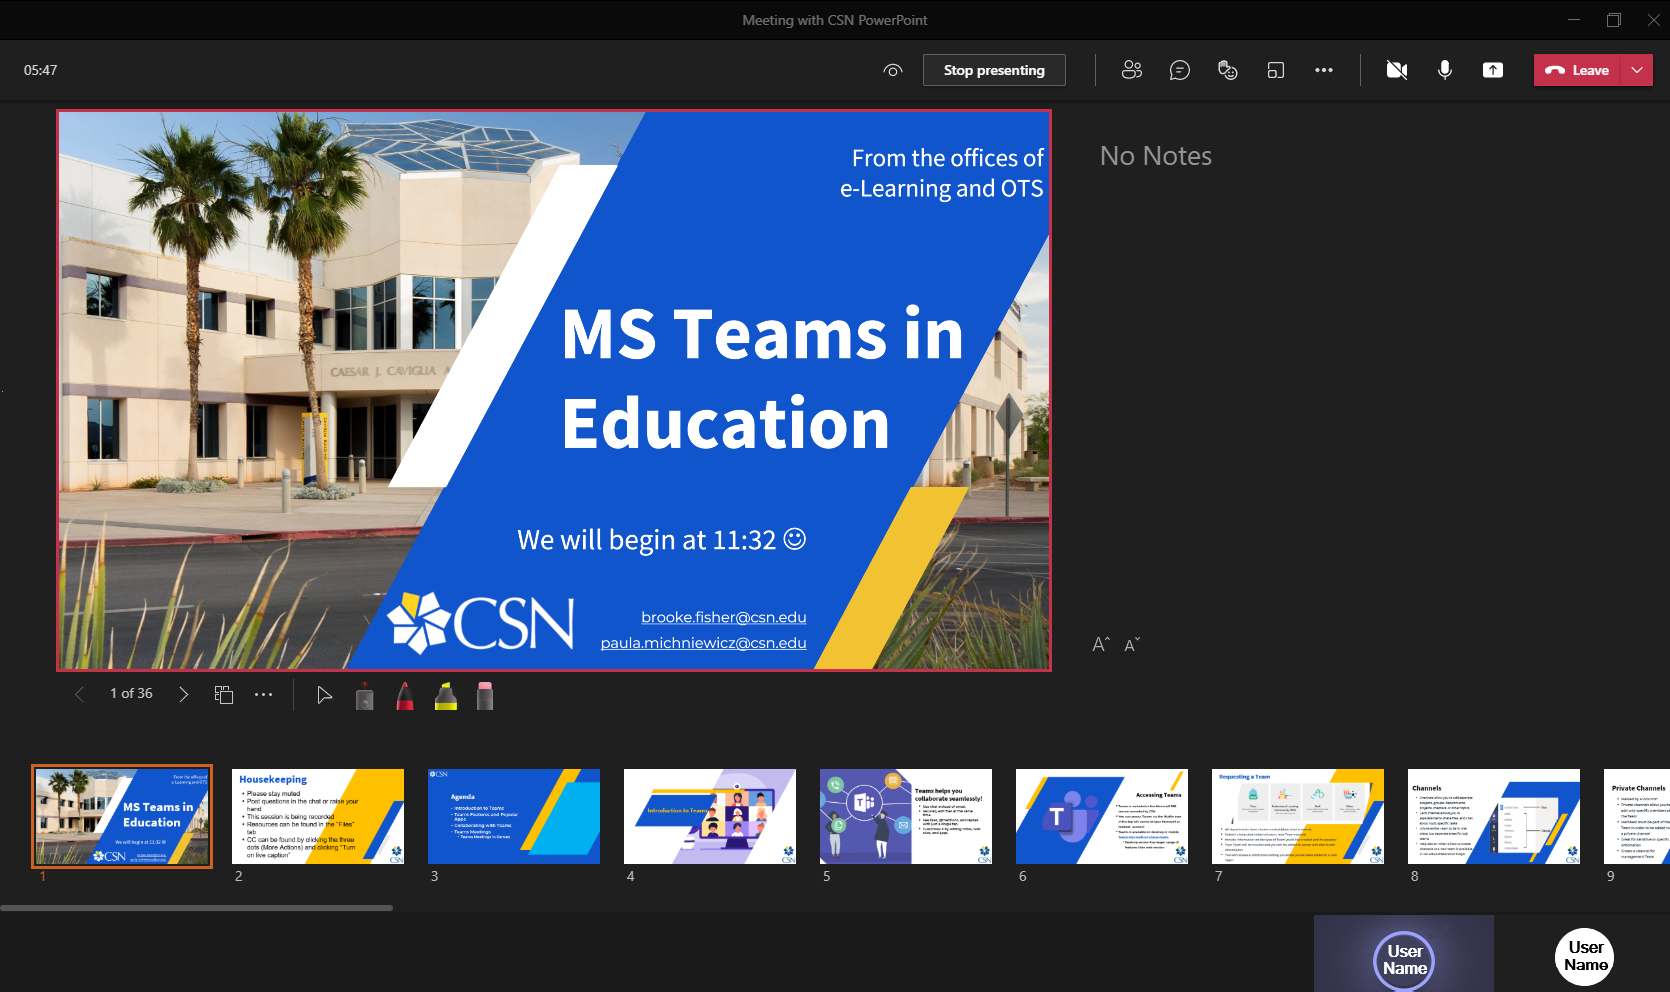
Users can now share PowerPoint slides without leaving the meeting window. PowerPoint Live allows for easier slide controls, allows you to see all of your slides and speakers notes. Presenters will also have the ability to draw on the slides with a pen or highlighter as well as point with either your courser or a virtual laser pointer.
At the top of your screen, click the Share content button from your meeting controls. Then select your presentation from the PowerPoint Live dropdown list. If you do not see your PowerPoint in the dropdown list, you can search your files by choosing to Browse OneDrive or Browse my computer.
Meeting participants have the ability to move to a different slide in a shared PowerPoint without interrupting the presentation. If you do not want users to move ahead on their own, select the  next to the Stop presenting button.
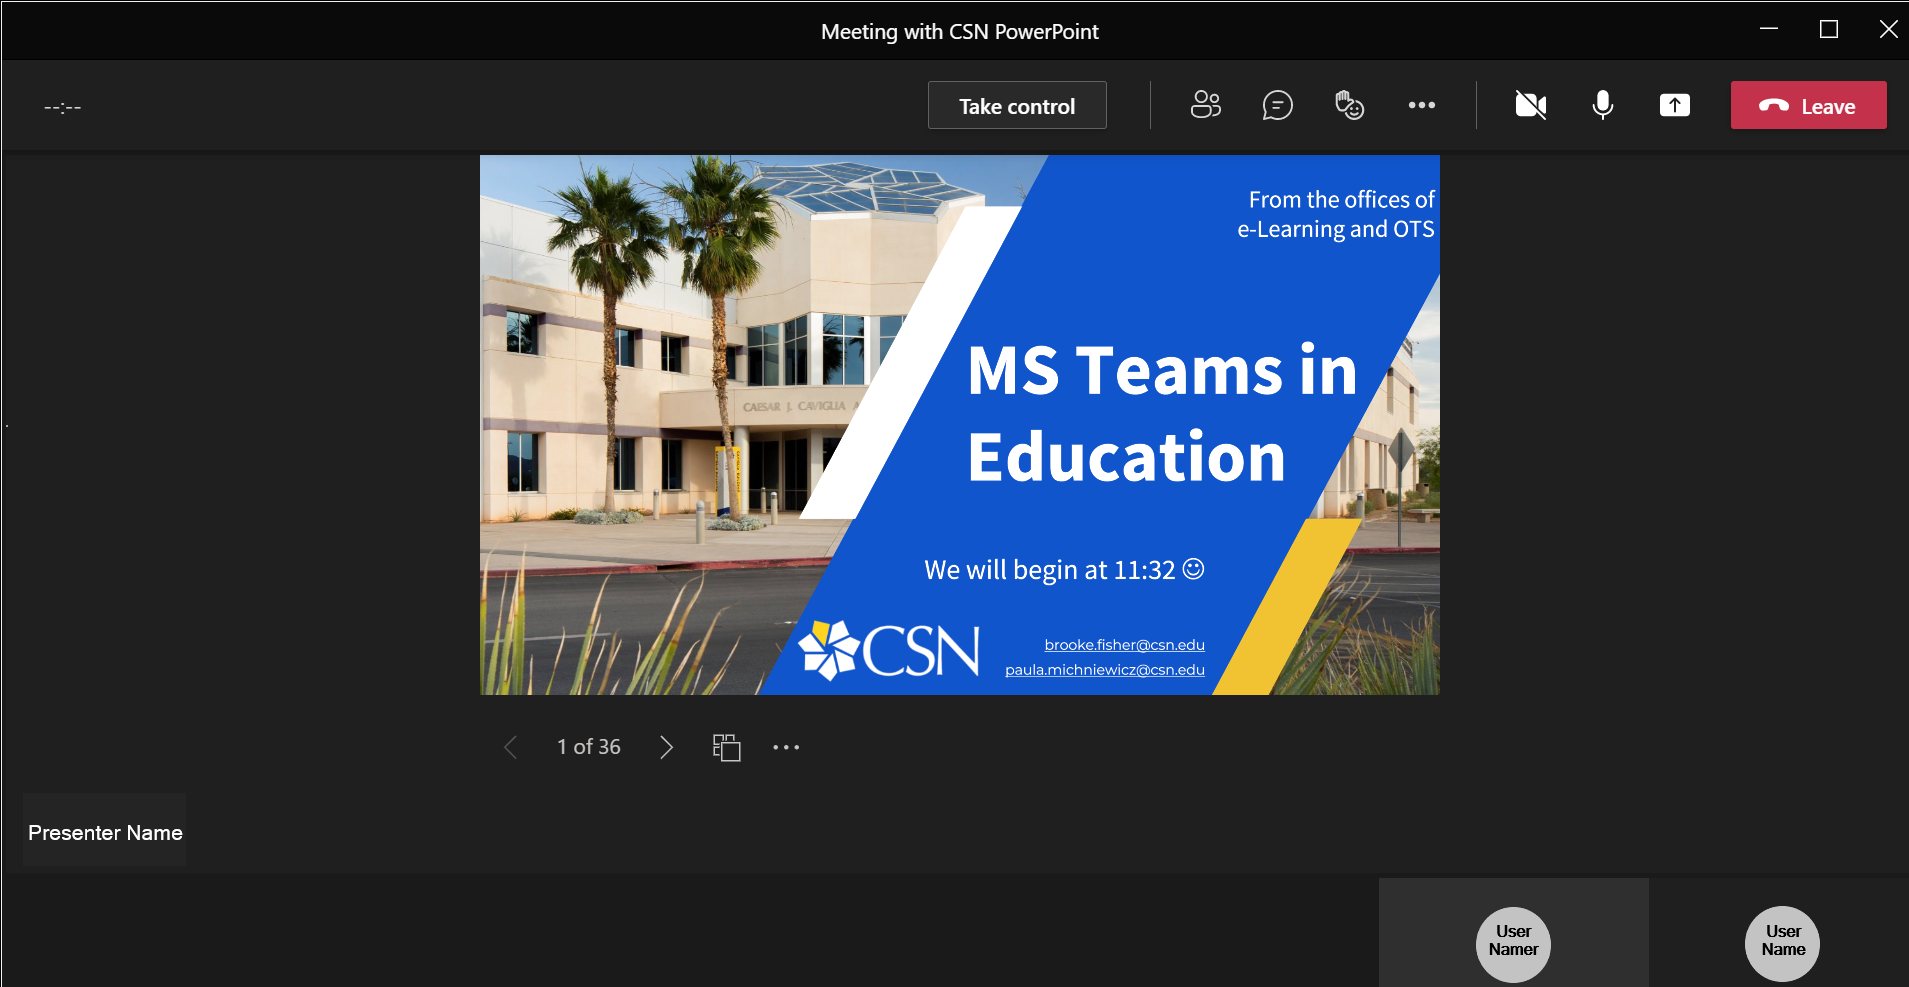
- As a meeting participant, you can use navigation arrows to move change slides without disrupting the live presentation.
- Rejoin with the presenter by clicking Sync with presenter
- If you prefer viewing in high contrast mode, select the three dots (more options) at the bottom of our screen, then select View slides in high contrast.
Visit Microsoft Support to learn more.
- To share content as a presenter on a mobile device select the tree dots (more options) then select Share.
- You can choose to share a photo, a video, a PowerPoint, or to share your entire screen.
- Once you have selected an item, tap Start Presenting
- When you are done sharing, tap Stop Presenting
Visit Microsoft Support to learn more.